|
I've done a bit of fiberglassing over the years, both on my Alberg 30 and on various small boats. I learned much of what I know from Don Casey's book, This Old Boat. I also had some expert advice in the old days of the On-Line Yacht Club on Compuserve. The rest I've learned from trial and error. I'll tell you now that some of the expert advice is difficult to follow.
Glass fiber and polyester resin is wonderful stuff. It's low-tech by today's standards, but quite forgiving and very malleable. And for the strengths you need for small boats, it's extraordinarily easy to make repairs. It's understandably scary the first time, though. Maybe the combination of Don Casey's book and this page will make it a little less so.
Bear in mind that the techniques I present here are not for museum quality boats. This produces a very serviceable repair, generally sturdier than the original glass. And if you gain a feel for the work, sand it smooth, and paint it, it can even be aesthetically pleasing.
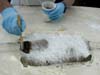
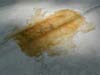 Here we see a typical half-hearted repair. A bit of glass cloth has been laid over a crack and dribbled with epoxy resin. It's both unsightly and unnecessarily fragile.
One of these days I'll do a page on the relative merits of epoxy and polyester, but for now, let me just say this: For a permanent patch on a small polyester boat, use polyester for the repair.
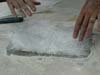
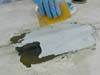
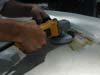 We start by grinding off the old repair using 36-grit sandpaper. (See tools for more on the tools I use.) Wear a dust mask for this. We also grind off the gelcoat around the damaged area. At the damage itself, we grind down to the good glass, in this case reaching the inner roving. We work on getting a broad smooth taper out from the deepest grinding. The recommended taper is 8 to 1, but for thin hulls, this isn't very much. I like to surround the damage by at least 3 inches.
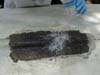
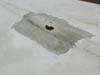 When we're done grinding, we have a smooth clean area to lay up new glass. You can see that we penetrated the roving in the middle while removing the damaged laminates. That's not a problem, as we'll add enough glass to strengthen this. A grinder goes through fiberglass very quickly, which I consider important, but you have to use it with a little discretion.
Wipe the area down with acetone to remove all the dust and oils.
 Next, we prepare some pieces of glass to lay up in the damaged area. I like to layup a layer of glass mat, then a layer of cloth, and another layer of mat. The mat has fewer gaps and bonds better, but the cloth gives tear resistence.
It's better to tear the mat than to cut it, as this gives a tapered edge. The cloth, I cut with a matt knife. Keep some extra scraps of mat handy, too.
I recommend using 3/4 ounce mat for small boat repairs because it's more pliable and gives you more control on building up the thickness. Here I used 1-1/2 ounce mat , because that's what I had. As you can see, it works fine, too, though it won't wrap a sharp corner. Your grinding shouldn't have left any. I generally use 8 ounce cloth (obviously measured using a different system of specification than the mat).
 Now we mix up some polyester resin and hardener. I wear nitrile gloves to protect my hands; latex sometimes melts in the resin. I typically use a wax-paper cup for a container (polyethylene also works, but some plastics will melt), a medicine syringe to measure the hardener, and stir with a tongue depressor from the craft store.
A respirator mask wouldn't hurt, but for small repairs I generally don't bother. Since I have a beard, I have to goop it up with something like GloveCote to get the mask to seal. If you're doing this a lot, protect yourself.
With polyester, you can vary the amount of hardener somewhat to modify the working time or adjust for the temperature. I find it too difficult, however, to measure by drops, as recommended on the container. Instead I calculated down to CCs of hardener per ounce of resin. I tend to work with batches of 4 to 8 ounces for small repairs. Once you mix it, you need to work at a fairly brisk pace. If it starts to get gloppy in the cup, throw it out and mix a new batch.
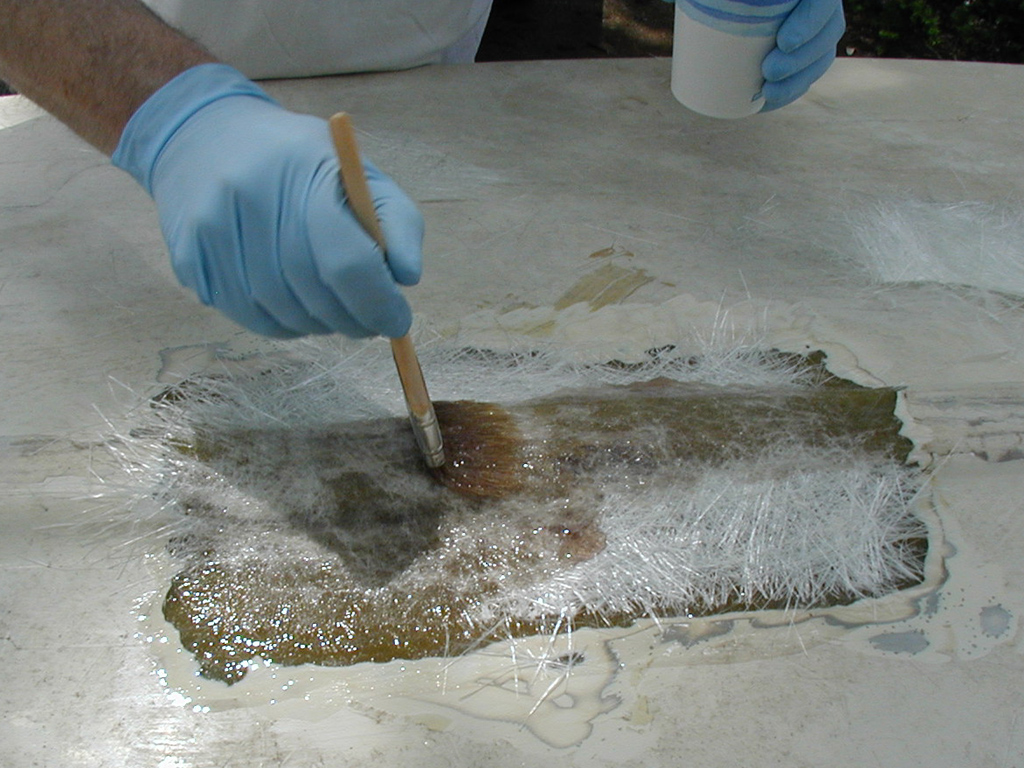
Using a cheap chip paint brush, we wet down the area to be repaired with catalyzed resin.
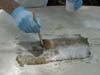 Next we lay the first layer of mat on the wet resin. We start with mat because it makes better contact with the old glass than cloth. This gives us a stronger bond.
Using the paintbrush, we work resin into the glass mat, soaking it until there's no white areas left. We also squeeze out any air bubbles. The goal is to use the minimum amount of resin needed to saturate the glass, but it's better to use slightly too much than slightly too little.
 We've ground a bit deeper in some areas, so we add a little more mat to fill in. This is why we've got extra bits of glass mat handy. Add it wherever you need it, to fill a low spot or extend the coverage.
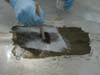
 On top of the mat, we add a layer of cloth. The cloth adds tear strength to the repair. Again, we wet it down with resin until none of it shows white.
 On top of that goes another layer of mat. The mat on top provides a smoother and stronger surface than cloth.
 We fill a few more low spots with bits of glass mat. Here we're having a bit of trouble with sag where we broke through the roving. It doesn't have to be perfect, though, and we don't want it too thick. Preferably it will come to just below the level of the surrounding gelcoat. When it's reasonably level, or when the resin starts to kick off, we let it sit for an hour or two to harden.
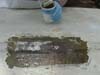
 After the repair is hard to the touch, we mix up some fairing putty to cover the patch. You can use ordinary polyester resin with a thickener such as microballoons, but a pre-mixed putty is less work. Use a plastic spreader or squeegee to spread the putty and press it down. We want to push this into any nooks and crannies in our glass patch, and apply enough that when we sand it we get a smooth surface even with the surrounding gelcoat. Be careful not to get bubbles in it. By applying this before the patch is fully cured, we avoid having to sand between the layers. This gives us a chemical bond between the layers rather than just a physical bond.
 After covering with fairing putty, we want to let it cure overnight before sanding and painting. You could do it sooner if you needed, but I think it's better to let it fully cure before sanding.
At this point, less than four hours have elapsed since we started.
Note: I generally find that I've added a bit too much glass in places and sand through the fairing putty into the glass when getting it smoothe. That's not a problem, though it may slow you down if you've got a low-power sander.
Please support this business that supports the Alberg 30 Association:

|